This method can be used on a onesie, tshirt, sweatshirt, towels...let your imagination run wild!
1. Select a fabric for the applique. For simple shapes, use a large, busier pattern. For a detailed shaped, choose a smaller print.
2. Wash and dry the fabric and onesie to reduce shrinking.
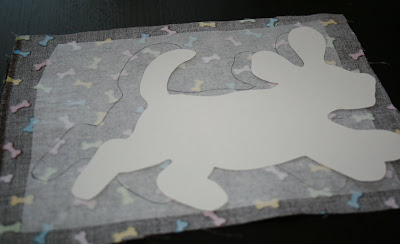
3. Download, draw or trace any silhouette onto card stock. The silhouette should be approximately 4-6 inches wide, depending upon the size of your onesie or shirt.
4. Cut out the silhouette.
5. Cut a piece of fabric 2 inches larger than the silhouette.
6. Cut a piece of webbing one inch larger than the silhouette.
7. Using an iron on the wool setting, iron the webbing onto the back of the fabric; the rough side of the webbing should be facing the wrong side of the fabric. Allow the paper-backed fabric to cool. (Depending upon the webbing selected, you may not need a damp cloth over the fabric or have to find the rough side, etc. Just use a light, double sided fusible webbing for cotton to cotton, typically cheaper by the yard. Directions come on the package or outer paper.)
8. Trace the silhouette onto the webbing paper backing. The silhouette should be upside down if the direction matter, for instance, letters, numbers, etc.
9. Cut out the silhouette from the paper-backed fabric.
10. Seal the edges of the cut fabric with fray check to prevent unraveling.
11. Peel the paper backing from the applique, exposing the other side of the webbing.
12. Position the applique, fabric side up, onto the onesie. If you intend to wear pants or a skirt with the onesie, make sure the cut out sits high enough so it avoids the waistband.
13. Lay a damp cloth over the applique and iron with steam for 10 seconds or according to the directions on the webbing.
14. Now your fabric should be fused to the onesie. Choose a complimenting thread and zigzag stitch on the sewing machine, leaving the needle down so it's easier to navigate the corners. I leave about 1/8 inch seam around the edge.
15. At the beginning and end of the stitching, do a couple reverse stitches to lock in the thread. I knot the two strings on the inside of the shirt and just cut the front, but you can thread these back through and knot too, if you have the patience.
Adapted from Martha's
tutorial.


